


Welcome to this comprehensive step-by-step guide on mushroom farming for beginners. In this guide, we will walk you through the process of starting your own mushroom cultivation at home. Whether you have never farmed before or are simply looking for a fun urban farming project, this guide is tailored for you. We will focus on indoor cultivation using simple materials, selecting beginner-friendly species such as oyster mushrooms and shiitake mushrooms. By following these instructions, urban dwellers with limited space can confidently embark on their own home mushroom cultivation journey.
1. Introduction to Mushroom Farming
Mushroom farming for beginners is a rewarding and accessible hobby that introduces you to the fascinating world of fungi. Unlike traditional agriculture, home mushroom cultivation requires minimal space and relatively low investment in equipment. Mushrooms are fascinating organisms because of their rapid growth cycle and the transformative way they turn organic materials into delicious, nutritious food.
This guide aims to demystify the process of mushroom cultivation so that you understand the science behind mushroom growth and the practical steps needed to cultivate your first crop. Whether you’re interested in your own kitchen harvest or simply looking to expand your gardening horizons, this guide provides all the information you need in straightforward and clear language.
2. Selecting Suitable Mushroom Species for Beginners
Before starting your mushroom farming adventure, it’s essential to choose the right species. As a beginner, you want a mushroom that is resilient, beginner-friendly, and does not require overly complicated growing conditions. Two of the best options for starting out are:
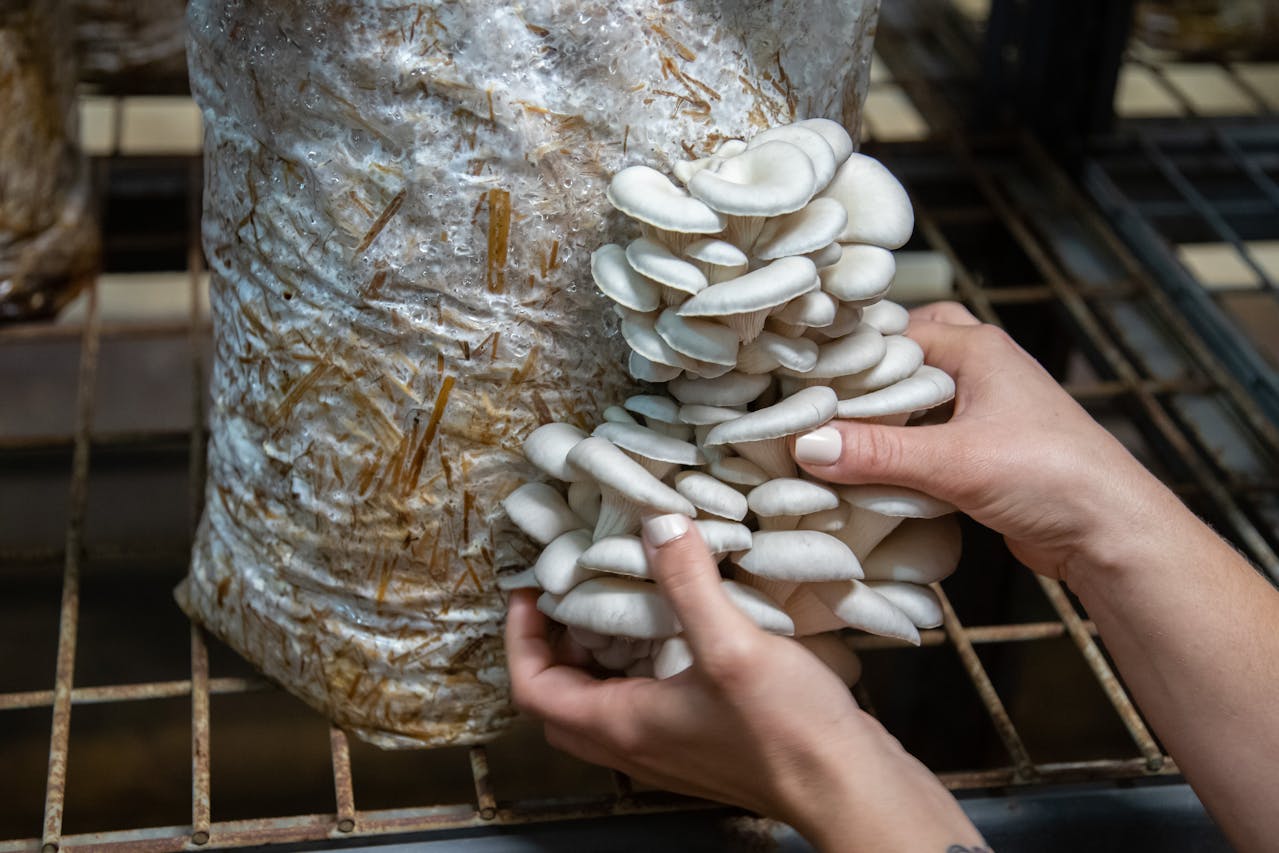
Oyster Mushrooms
Oyster mushrooms are the go-to choice for beginners due to their:
- Fast growth rate: They typically colonize substrates quickly.
- Flexibility: They can thrive on a variety of substrates like straw, coffee grounds, or sawdust.
- Low maintenance: They seldom require extreme environmental conditions.
- Delicious flavor: They are prized for their delicate taste and texture.
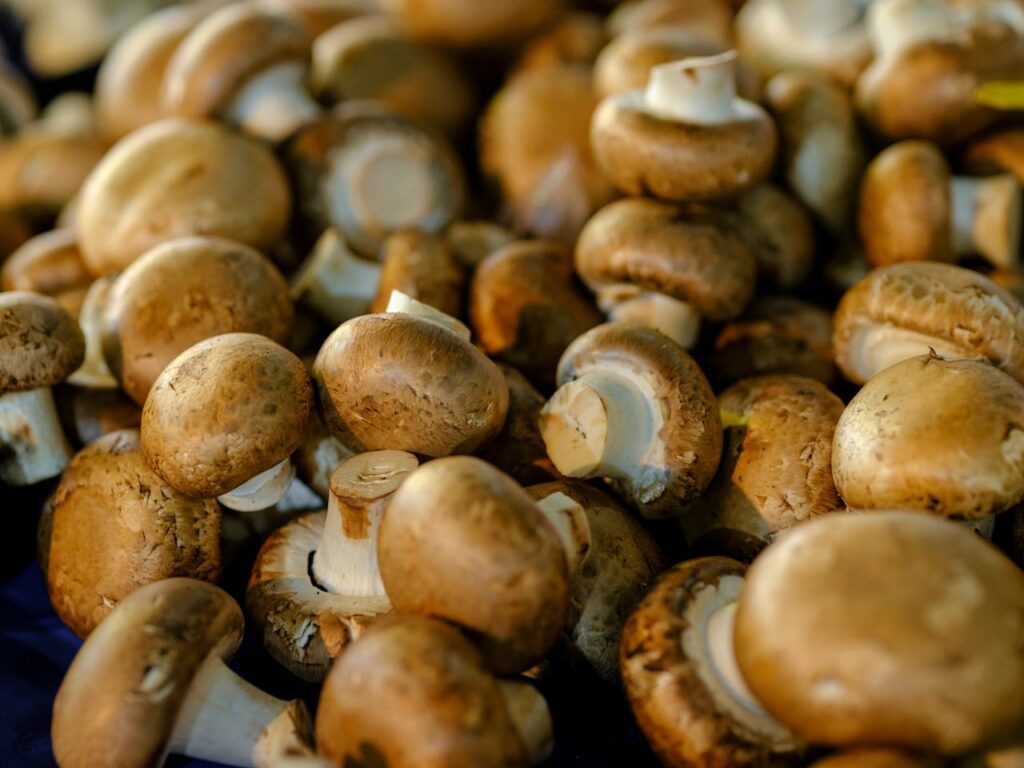
Shiitake Mushrooms
Shiitake mushrooms are another excellent option, offering:
- Robust growth: They grow well on hardwood logs or sawdust blocks.
- Nutritional benefits: They provide rich umami flavors as well as various health benefits.
- Cultural appeal: They are a traditional favorite in many cuisines around the world.
For urban dwellers with limited space, these species are ideal for home mushroom cultivation because they require minimal outdoor space and can thrive indoors with the right setup.
3. Gathering Materials and Supplies
Before you begin the physical work of mushroom farming for beginners, you need to collect all necessary materials and supplies. Here’s a list of standard items you will need for both oyster and shiitake cultivation:
Basic Supplies
- Mushroom Spawn: Purchase high-quality spawn from a reputable supplier. Look for either oyster or shiitake mushroom spawn depending on your chosen species.
- Substrate: The material on which mushrooms grow. For oyster mushrooms, straw, coffee grounds, or sawdust can work well. For shiitake mushrooms, hardwood logs or specifically prepared sawdust blocks are ideal.
- Containers: Use plastic bags, buckets, or grow kits suitable for mushroom cultivation. Containers help create a controlled microenvironment.
- Tools: A sharp knife or scissors, a spray bottle for misting, a clean work area, and personal protective equipment like gloves and masks.
- Sanitizers: Use diluted bleach or hydrogen peroxide to clean tools and work surfaces to prevent contamination.
Additional Materials for Indoor Cultivation
- Plastic sheeting or a small greenhouse unit: This helps maintain humidity indoors.
- A thermometer and hygrometer: To monitor temperature and humidity levels, ensuring optimal growth conditions.
- Lighting (if necessary): While mushrooms do not need light in the same way plants do, a low-intensity light can help you monitor progress and provide a natural day/night cycle.
Tip: Always ensure your supplies, especially the substrate, are free from contaminants by cleaning and sterilizing them properly before use.
4. Preparing Your Growth Medium
Properly preparing the growth medium (substrate) is one of the most critical steps. This phase ensures that the colonizing mushroom spawn has a clean, nutrient-rich environment in which to grow.

Step 1: Processing the Substrate
For Oyster Mushrooms:
- Chop or shred the straw: If using straw, cut it into smaller pieces, around 2-4 inches in length, to expose more surface area.
- Hydrate the substrate: Soak the straw or sawdust in water for several hours. This increases moisture levels essential for mushroom growth.
- Drain excess water: Ensure the substrate is moist but not boggy. Excess water can encourage contamination.
Step 2: Sterilizing or Pasteurizing the Substrate
Proper pasteurization or sterilization prevents unwanted microorganisms from taking over your substrate.
- Pasteurization: Heat the substrate in water at about 160°F (70°C) for 1 hour. This method is effective for home mushroom cultivation and retains some beneficial microbes.
- Sterilization: For a more controlled environment, especially with sawdust-based substrates for shiitake mushrooms, you can use a pressure cooker to sterilize the substrate at 15 psi for 60-90 minutes. Note that this method is more involved and requires additional equipment.
Step 3: Cooling and Preparation
After pasteurizing or sterilizing the substrate, allow it to cool completely in a clean environment. This cooling period prevents the heat from killing the mushroom spawn when it is later introduced.
Reminder: Always work on a clean surface and consider wearing gloves and a mask to avoid contamination during this delicate process.
5. Inoculation: Introducing the Mushroom Spawn
Once your substrate is prepared and cooled, the next step is inoculation — the process of mixing the mushroom spawn into the substrate. This is a crucial step in home mushroom cultivation because it kick-starts the growth process. Follow these steps for successful inoculation:
- Prepare your workspace:
- Clean your work table and tools.
- Disinfect your hands or wear disposable gloves to minimize the risk of contamination.
- Mix the spawn thoroughly:
- Carefully break up the mushroom spawn into smaller pieces if needed.
- Mix the spawn uniformly into the cooled substrate. Using a sealed plastic bag or container can help maintain cleanliness throughout the process.
- Fill your containers:
- Transfer the inoculated substrate into your chosen containers, ensuring not to pack it too tightly. Air circulation is key to successful colonization.
- If using plastic bags, make small holes or create slits in the bag to allow for some air exchange.
Keywords: mushroom farming for beginners, home mushroom cultivation
Tip: Work quickly but carefully during inoculation to keep the environment as sterile as possible. A slow process increases the risk of unwanted contaminants compromising your crop.
6. Incubation: Creating the Right Environment
After inoculation, the container now holds the potential for your mushrooms. The next step is incubation, during which the mushroom spawn begins to colonize the substrate. Think of incubation as the “germination” phase for mushrooms.
Step 1: Set up a Controlled Space
Choose a location in your home that meets several criteria:
- Stable Temperature: Most mushroom spawn thrive in temperatures between 65°F and 75°F (18°C – 24°C).
- Moderate Humidity: Aim for 80-95% humidity. Use a spray bottle to mist the area if necessary, or set up a small humidifier.
- Dark or Low Light: While light is not essential during the incubation phase, a dim environment can help mimic natural underground or shaded conditions.
Step 2: Monitor the Incubation Process
During incubation, you should monitor the progress of colonization over a period of 2 to 3 weeks. Look for these key signs:
- White Mycelium Growth: The substrate should gradually be overrun by white, thread-like mycelium. This indicates that the spawn is successfully colonizing the substrate.
- Temperature and Moisture: Ensure the environment remains within the desired temperature and humidity range. Adjust if necessary by moving the container or misting the substrate.
Remember, patience is key during incubation. Resist the temptation to open containers too frequently as it can disrupt the colonization process and introduce contaminants.
7. Fruiting: Harvesting Your Mushrooms
Once the substrate is fully colonized by the mycelium, it’s time to shift focus towards fruiting – the stage when your mushrooms will begin to form and mature for harvest.
Step 1: Initiate Fruiting Conditions
Fruiting conditions differ slightly from the incubation phase. At this stage, you need to adjust the environment to stimulate mushroom formation:
- Increase Fresh Air Exchange: Open up the container slightly (for plastic bag systems, enlarge or create additional slits) to simulate outdoor conditions. Mushrooms need oxygen to form fruiting bodies.
- Lower Temperature: Slightly lower the temperature to around 55°F to 65°F (13°C – 18°C) for many species, particularly for oyster mushrooms. For shiitake mushrooms, a gradual drop in temperature often signals the start of fruiting.
- Maintain High Humidity: Continue misting regularly to provide the moisture necessary for mushroom growth while ensuring there is enough airflow.
Step 2: Care and Development
As you transition into the fruiting stage, observe the following:
- Mushroom Primordia Formation: Small, pin-like structures (primordia) will begin to form where the mushroom caps and stems will eventually develop.
- Growth Monitoring: Monitor the growth daily. Depending on your mushroom species and environmental conditions, mushrooms might mature within 5 to 10 days following the initiation of fruiting conditions.
Step 3: Harvesting
Harvest your mushrooms at the optimal time for the best flavor and texture:
- Timing: For oyster mushrooms, harvest when the caps are fully formed and still slightly curled under at the edges. For shiitake, harvest when the caps have fully opened but are still firm.
- Method: Use a sharp, clean knife or gently twist the mushrooms off the substrate. Be careful not to disturb the surrounding mycelium to preserve future flushes.
- Storage: Freshly harvested mushrooms can be used immediately in recipes or stored in the refrigerator for up to a week. Drying is another excellent preservation method.
Keywords: mushroom farming for beginners, home mushroom cultivation
Tip: Multiple flushes (harvest cycles) can occur if you continue to care for your substrate. After a flush, allow the substrate a rest period before reinitiating fruiting conditions.
8. Troubleshooting and Tips
No cultivation process is without its challenges. Here are common issues you might face during your mushroom farming journey, along with tips to address them:
Contamination
Issue: Bacterial or mold growth can occur if contaminants are introduced at any stage. Telltale signs include abnormal colored patches, unpleasant odors, or fuzzy mold growth.
Solution: Always work in a clean environment, sanitize all tools, and if you notice contamination early, remove and discard the affected portions. Maintaining proper pasteurization/sterilization techniques is critical.
Slow or Poor Colonization
Issue: If the mycelium is growing slowly or appears weak, it might be due to improper moisture levels, temperatures that are too cold or too hot, or a non-ideal substrate.
Solution: Double-check your environmental conditions. Ensure that your substrate isn’t too moist or too dry and that the temperature remains within the optimal range. Sometimes, additional misting or a temporary adjustment in ambient conditions may be necessary.
Issues During Fruiting
Issue: Mushrooms may fail to form properly or develop abnormalities if the environmental shifts between incubation and fruiting are too abrupt.
Solution: Gradually adjust conditions when transitioning to the fruiting phase. Ensure adequate humidity and airflow and try to mimic a natural change in environment rather than a sudden shift.
General Tips for Success
- Keep a cultivation journal documenting dates, temperatures, humidity levels, and observations. This helps you tweak parameters for future batches.
- Be patient. Mushrooms are living organisms that need time to develop. Rushing any phase may compromise your final yield.
- Join online forums or local groups related to mushroom farming for beginners. Sharing experiences and troubleshooting together can be immensely supportive.
- Experiment with small batches first until you gain confidence in the process. Once you understand the subtleties, you can scale up your home mushroom cultivation.
Remember: Every environment is slightly different, so a little trial and error will help refine your technique over time.
9. Conclusion and Next Steps
Congratulations on taking the first steps in your mushroom farming for beginners journey! With careful attention to substrate preparation, inoculation, environmental conditions, and patience through the process, you are well on your way to successfully cultivating mushrooms right in your home environment.
This guide has provided detailed instructions to help urban dwellers with limited space begin their adventure in home mushroom cultivation. By starting with easy-to-grow species like oyster and shiitake mushrooms and following the step-by-step process outlined here, you have a strong foundation for future experiments and growing successes.
As you gain more experience, consider experimenting with different substrates, exploring additional mushroom varieties, or even integrating advanced environmental controls to optimize yield. Remember that every failure is a learning opportunity, and the more you practice, the better your results will be.
We hope this guide has demystified the process of mushroom cultivation and empowered you to transform your urban living space into a mini mushroom farm. Happy growing!
Additional Resources
- Books and online courses on mushroom farming for beginners.
- Local mycology clubs or community agricultural programs.
- Websites dedicated to urban farming and sustainable living.
If you have feedback or further questions, consider visiting online forums or connecting with experts in home mushroom cultivation. The community is always eager to help new growers succeed.
Final Thought
Mushroom farming for beginners is not only a fun and engaging project but also a step toward sustainable living and creative urban farming. With minimal space and a bit of dedication, your home mushroom cultivation adventure can flourish into a rewarding practice that supplies you with fresh, nutritious mushrooms while deepening your connection with nature.